Artilce #34
Introduction
Here you will learn, How to Take a Screenshot on Asus Laptop.
If you own an Asus laptop, you probably use the Windows operating system. Typically, laptops and smartphones are similar in many ways. Taking a screenshot is one of the common things you can do on a laptop and a smartphone.
A screenshot captures information displayed on the screen if it cannot be saved or downloaded. Taking a screenshot entails giving the operating system a command prompt by clicking one or a few buttons on the keyboard.
There are numerous ways of taking a screenshot on a laptop. Taking screenshots on Asus laptops is similar to doing it with other laptop brands. However, slight differences can arise due to the brand of laptop or the operating system.

Although you can take screenshots using the onboard tools, sometimes you can use additional tools or programs online. Some of the tools are free, while others are premium. Here are some of the ways you can take a screenshot on an Asus laptop:
Use the Print Screen
This is the easiest way of taking a screenshot on an Asus laptop.
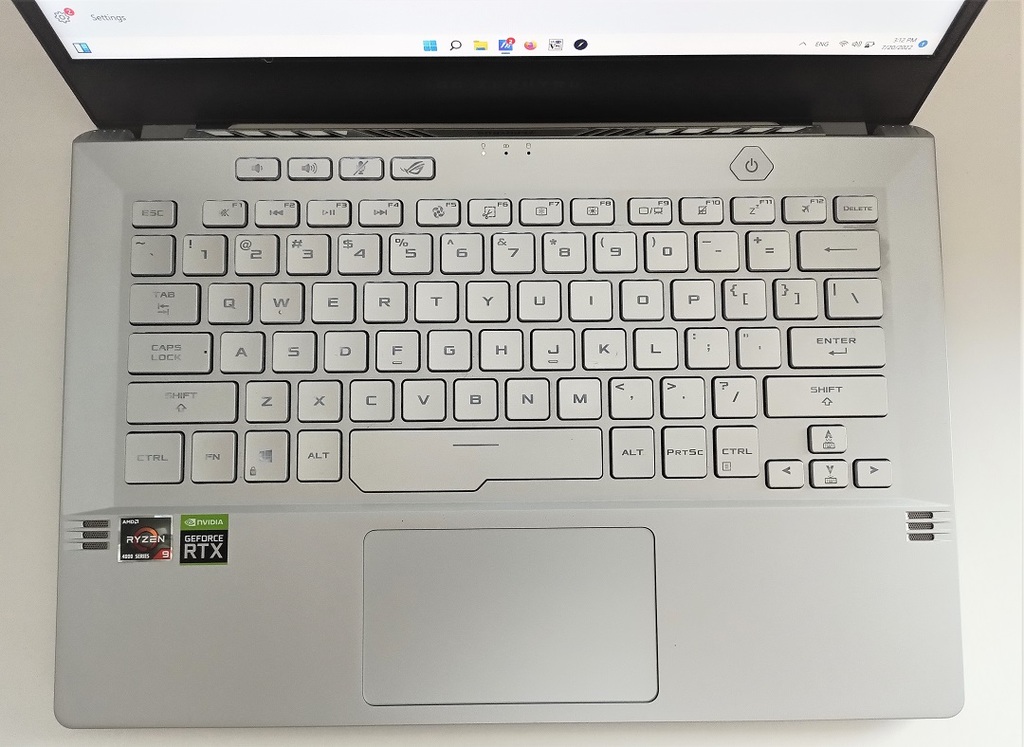
Just press the PrtSc key to take a screenshot of the entire screen.
After taking the screenshot, you need to save it on your laptop using an image editing tool, for example, Microsoft Paint.
Therefore, press the Windows Logo key to navigate your laptop’s ‘All Programs’ section and then type ‘Paint.’ Click Paint to open the editing program. Paste the screenshot (press Ctrl and V) and then save the image (Ctrl and S).
Taking screenshots on an Asus laptop is much easier if you have installed Windows 8 or 10. To take a screenshot of the whole screen, press the Windows logo key and the PrintSc key simultaneously.
You will notice that your laptop’s screen blips or dims momentarily. That’s an indication you have taken a screenshot. The screenshot is automatically saved in the Users > Pictures > Screenshots folder. If you want to edit the screenshot, open an editing tool like Microsoft Paint tool. Paste the image, edit, and save the screenshot.
Using the Snipping Tool

A snipping tool is a built-in program in Windows operating system. Present since Windows Vista, the snipping tool is one of the easiest ways to take a screenshot on a laptop. You can find the Snipping tool by clicking the Windows button and searching ‘Snipping Tool.’ To take a snapshot, open the Snipping tool and click ‘New.’
Although the default snap type is rectangular, you can choose the free form, windows, or full-screen snip forms depending on your preference or preferred use of the snips.
Understanding that the Snipping tool does not save the screenshots automatically is essential. Ergo, always save the screenshots manually to avoid losing the captured information.

The Alt + PrtSc Option
Using the Alt and PrtSc, you can take a screenshot of an active window. However, the screenshot is saved to the clipboard.
Therefore, you need to use a third-party app or open Microsoft Paint then press Control-V to save the image.
The same applies if you want to edit the screenshot.
Conclusion
Now that you know the steps and different ways of taking screenshots on Asus laptops, go ahead and try it.
Remember, you can use the steps mentioned above to take screenshots on any Asus laptop model, including Vivobook, Chromebook, Gaming Series, Commercial Series, Zenbook, and desktop models.
Read more >>
>> 15 Best Home Office Gadgets for 2023
>> 10 Best Sneakers for men 2022
>> 7 Most Prestigious Watch Manufacturers
>> The Best 5 Leg Machine Equipment for Strength and Tone.
>> The Best Gaming Computer under 1400
>> The Best Routers under $100
>> Best Laptops for Writers under $300
>> Chest and Triceps Workout for Strength


